
One of the requirements of the course which we are now taking, 5SD033 – Introduction to Game Development, is to post weekly updates about an artifact you have been working on in the previous week. My team is working on a game called The Last Signal which focuses on a pilot’s efforts to survive when his space exploration vessel picked up extraterrestrial life forms while the ship was landed on a planet.
Once a week I will make a post beginning with “The Last Signal” where I will describe one selected artifact I have been working on during that week.
This week’s post is about correct placement of object colliders — bounding boxes that are placed around sprites to detect if the sprites overlap, i.e. if two in-game objects represented by the sprites touch.
In game code, game objects, such as players, enemies, bullets etc., are represented as (mathematical) points. A player is just a single point on a plane and player coordinates are the coordinates of this point. Positions, velocities, accelerations etc. are all calculated treating the objects as points. But the objects which we see on the screen are more than a single point (a pixel) — they are sprites covering hundreds and thousands of pixels. And it is here that a dichotomy between how an object is treated in the code and how it is represented visually arises.
It is unreasonable to handle objects not as mathemtical points but as a collection of pixels and calculate every one of them separately. That makes the code cumbersome and is probably programmatically inefficient. It is much easier to continue treating obejcts as single points and draw the collection of pixels (the sprite) with respect to those points.
Let us start with how sprites work in SFML.
Every sprite has width and height. In addition, every sprite has an origin which is 
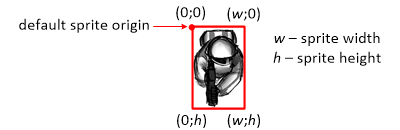
A sprite also has a parameter called position. Position can be changed during run-time.
When you tell SFML to draw a sprite via the draw command window.draw(sprite) sprite drawing begins at the position the sprite has at the moment the draw command is issued. The origin of the sprite is drawn at that position and then the whole sprite expands around the origin point.
So if you tell the above sprite to be drawn at point 
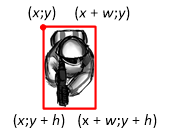
The sprite expands from point 
Now suppose sprite origin was set not to 
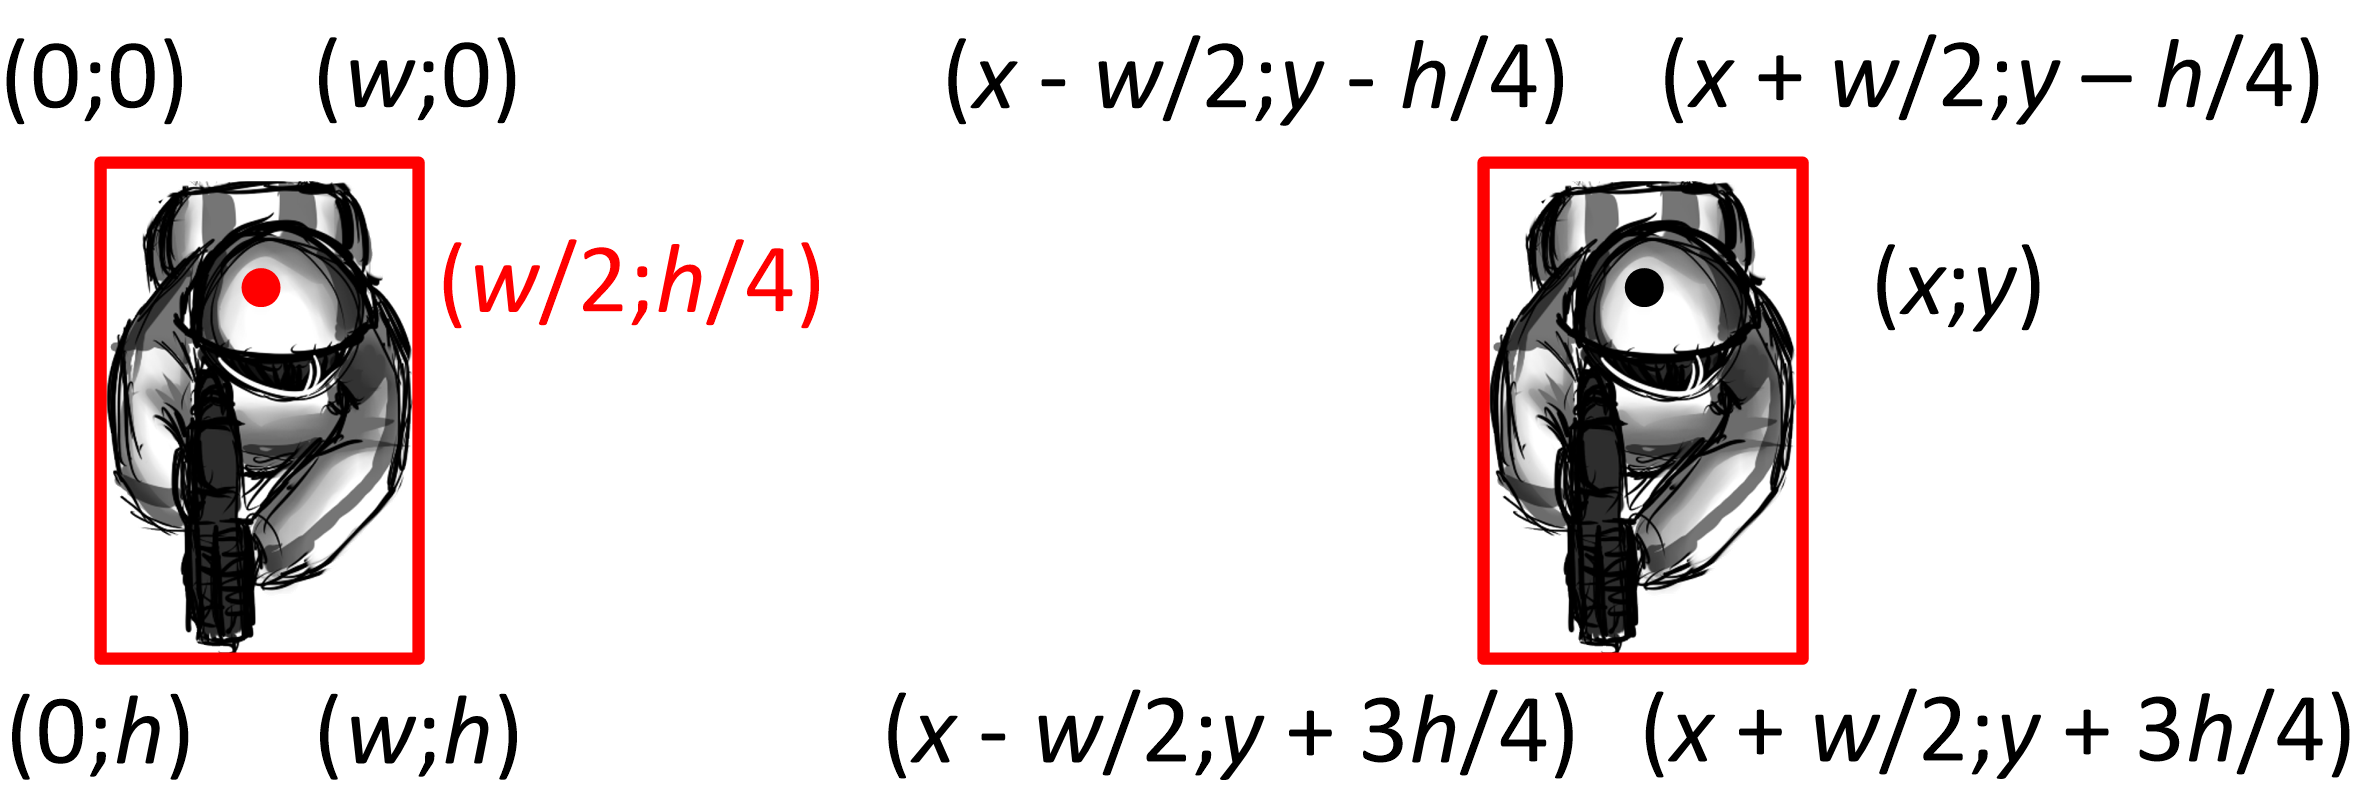
So if you tell SFML to draw the same sprite at the same point
Why would anyone want to change the default origin to something like in the example above? Because the origin also serves as the point of rotation. When you tell SFML to rotate a sprite, it does so about the sprite origin point:
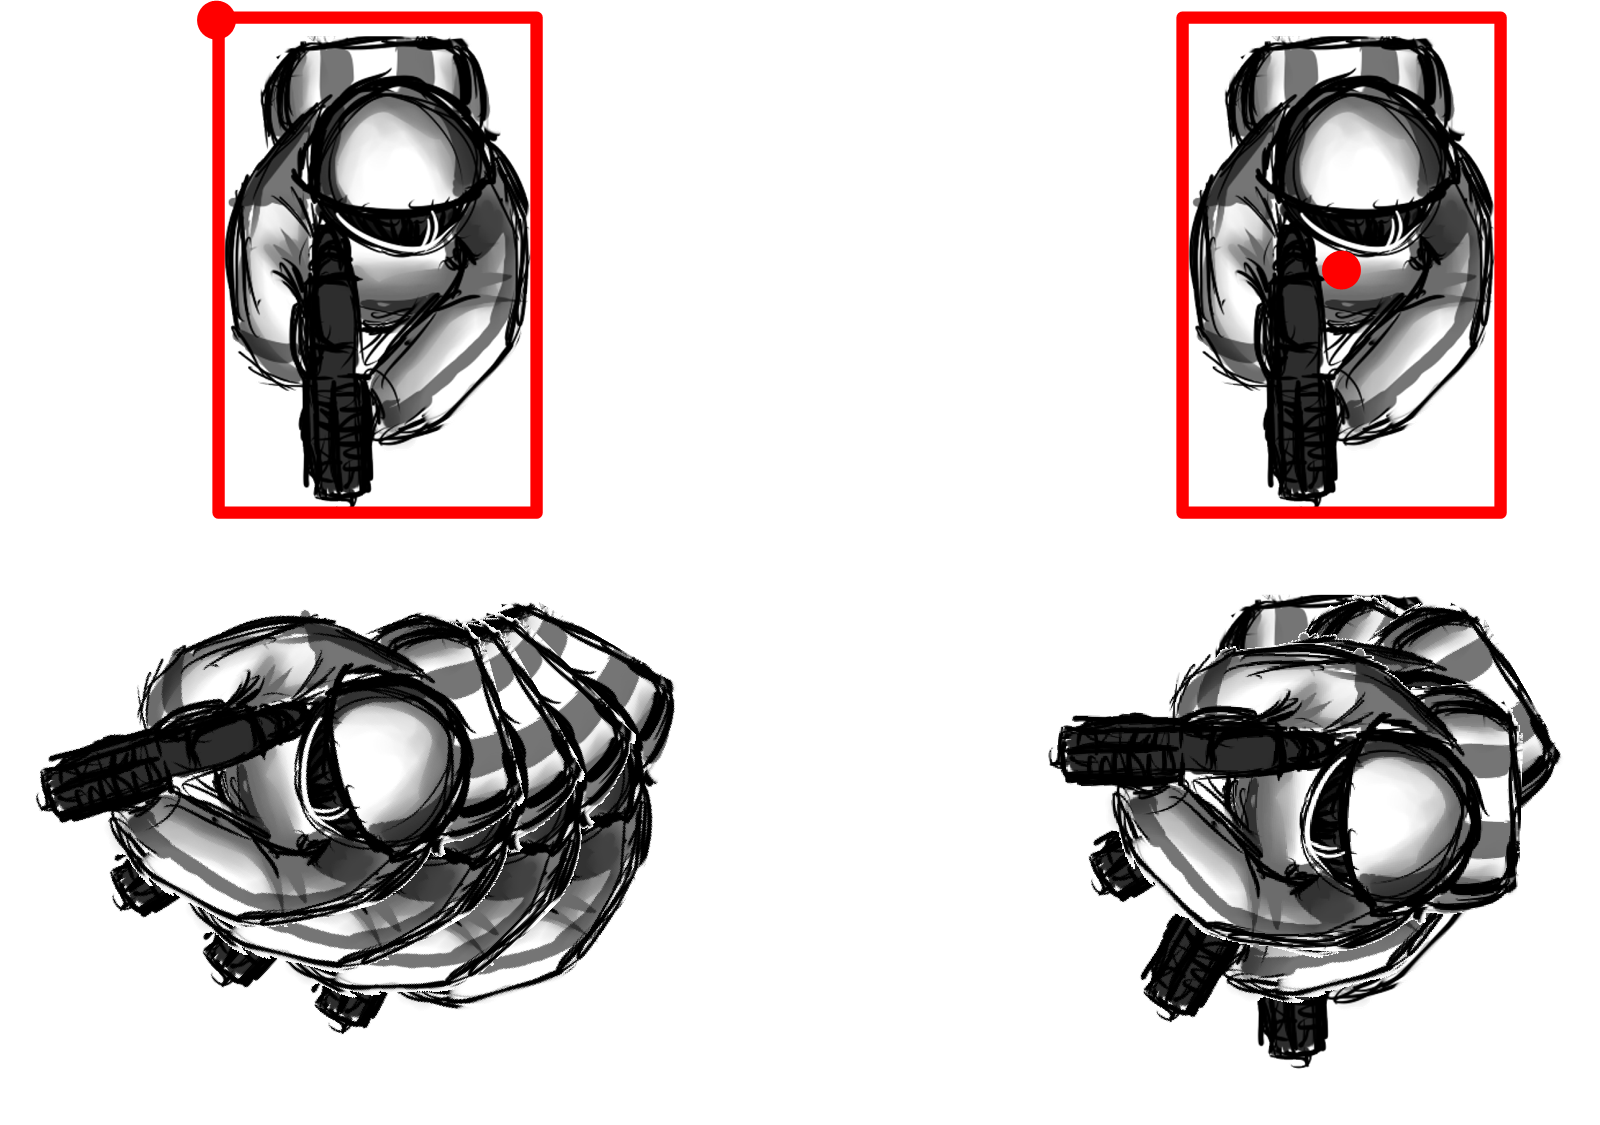 In our game, it feels more natural if the player sprite rotates about its centre (picture to the right), and not about the top left corner, which is the default (picture to the left). It is so because the angular momentum is imparted to the player by their own thrusters which are attched to the player’s space suit; rotation therefore occurs about an imaginary axis inside the player’s body, not outside it. We want to simulate this in our game to make it seem more realistic.
This was an introduction to one probematic area in our game.
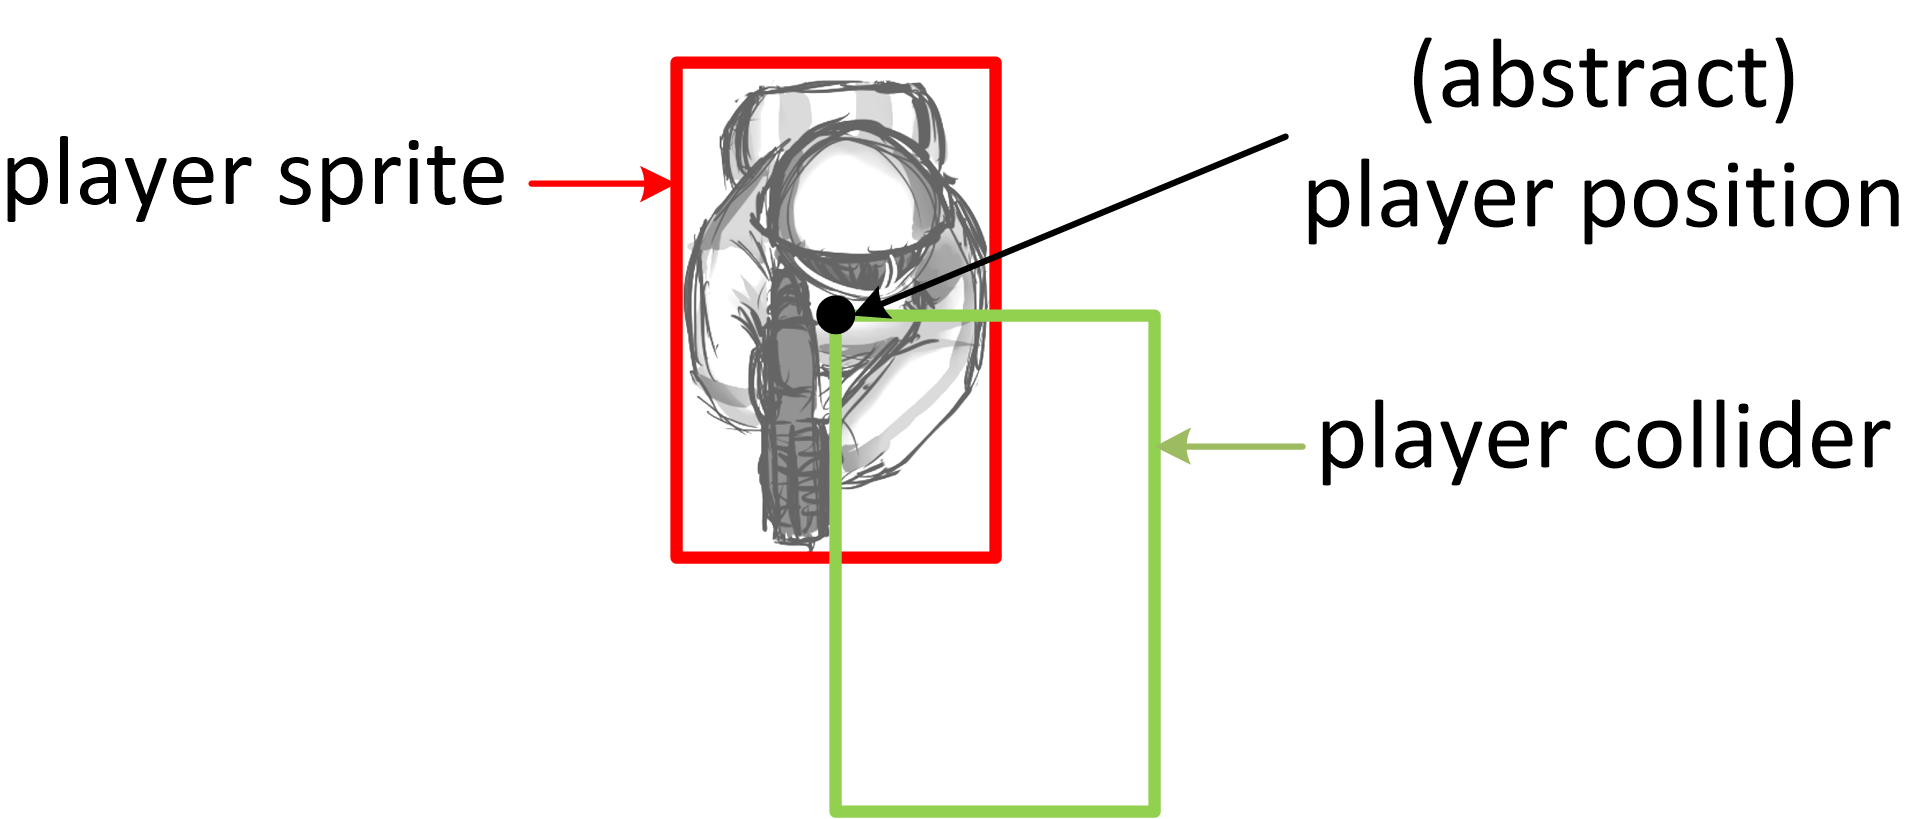
In our game, we set the origin point of player sprite to be in the middle of the sprite. The sprite is drawn at the (abstract) player position which is calculated by the code once every frame. The sprite then expands in all directions around the player position.
On the other hand, collider always expands down and to the right from the player position because of the inherited code from the Arkanoid game:
m_collider->SetPosition(m_x, m_y);
m_collider->SetWidthHeight(m_sprite->getGlobalBounds().width, m_sprite->getGlobalBounds().height);
The obvious fix here by just looking at the picture is to set collider position not exactly to player position, but to offset it half the sprite width to the left and half the sprite height upwards. So the code looks like this:
m_collider->SetPosition(m_x - m_sprite->getGlobalBounds().width * 0.5f, m_y - m_sprite->getGlobalBounds().height * 0.5f);
m_collider->SetWidthHeight(m_sprite->getGlobalBounds().width, m_sprite->getGlobalBounds().height);
and the result is this:
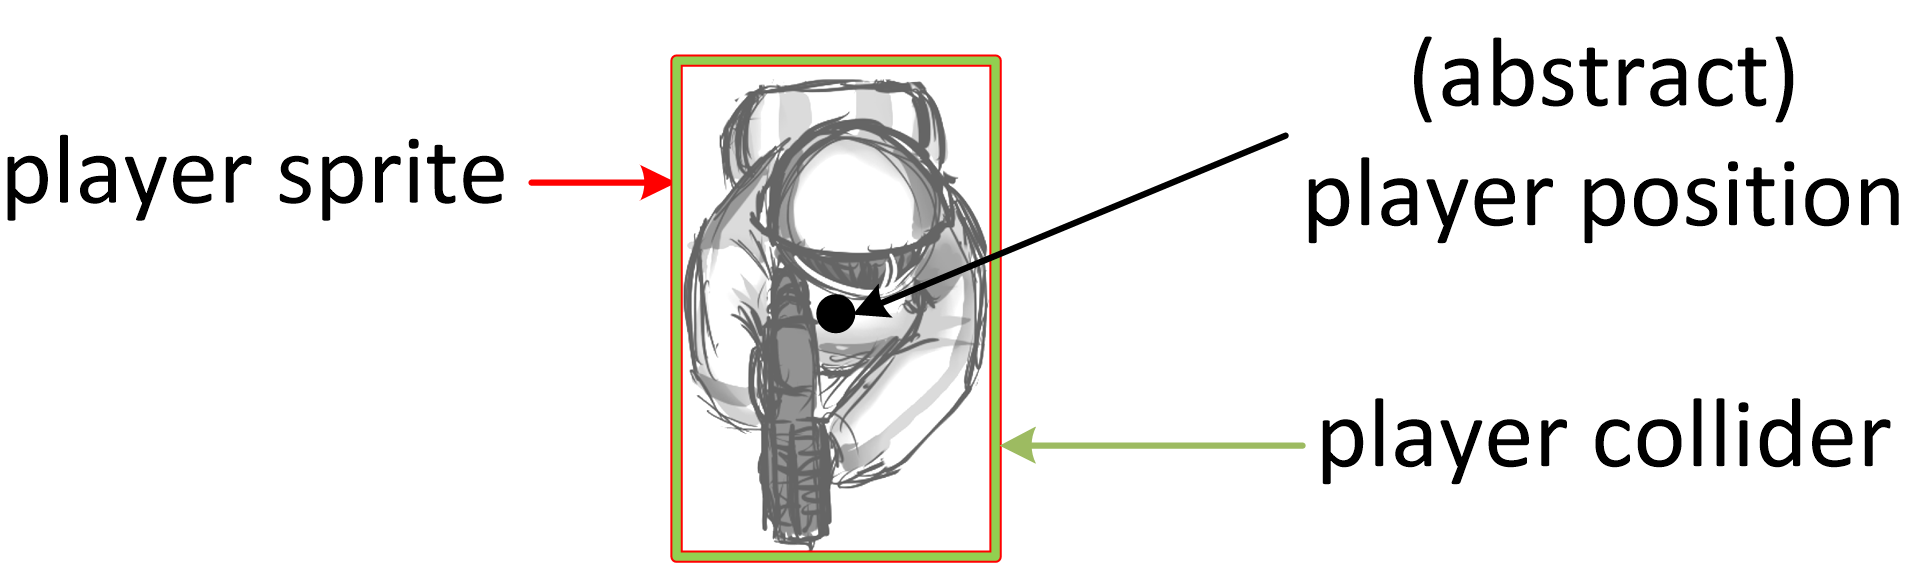
So this small code change where an object’s collider was created (the constructor) and where the collider position was updated (object’s update function) allows me to keep object colliders in correct positions with respect to (abstract) parent object positions.

Overall this is a very interesting blog post that describes and shows step by step how you have thought during the process of making your avatar to move and rotate. Something I miss is a screenshot from your actual game, every picture you chose to post was very describing and easy to understand but I can’t help to wonder: how does this look in the actual game? If maybe would not explain more about how you thought it’s more how I, as a reader, got interested in how it actually looks and works in-game.
I can’t come with a lot of negative or constructive criticism since I personally as a programmer learned a lot from this post(I wish we had any rotating item in our game so I could test this out as soon as possible). But in the future, continue with all these describing images! It is really good that you show both how it should be and how it should not be, for example when you showed one picture where the sprite is rotate from the upper left-corner and the one that was rotated from the middle. It’s like they say, a picture is worth more than a thousand words. If you just described what you meant I am sure I and everybody else would understand what you meant but showing a picture makes things more clear so keep using them to describe things in your blog! I personally wish for more pictures from in-game, I’m going to continue visit your blog and see how things evolve. Good luck Rokas!